Physical Address
304 North Cardinal St.
Dorchester Center, MA 02124
Physical Address
304 North Cardinal St.
Dorchester Center, MA 02124

If you are responsible for maintaining industrial machinery, compressed air systems, or high-voltage electrical equipment, you know that downtime is expensive. Finding a compressed air leak, a partial discharge, or a failing bearing before it causes a catastrophic failure requires skill and often hours of tedious work. The buy Fluke ii915 Acoustic Imager,Fluke ii915 review,Fluke ii915 pros cons,best acoustic imager for leak detection,should I buy Fluke ii915,Fluke ii915 vs alternatives is a purpose-built tool designed to solve these exact problems. It is an industrial-grade acoustic imaging camera that translates high-frequency sound into a visual map, allowing you to see problems that are invisible to the naked eye. The ii915 is not just a simple stethoscope; it is a sophisticated diagnostic device that combines a 124-microphone array with advanced processing algorithms. Manufactured by Fluke, a brand synonymous with rugged reliability in the test and measurement industry, this imager targets maintenance professionals, reliability engineers, and facility managers who demand precision and efficiency. Its primary innovation lies in its three dedicated operating modes—LeakQ, PDQ, and MecQ—which automate the analysis and simplify reporting, making it accessible for both seasoned pros and those new to acoustic imaging. When you decide to buy Fluke ii915 Acoustic Imager, you are investing in proactive maintenance, not just a reactive tool.

The Fluke ii915 is packed with capabilities that set it apart from basic acoustic cameras. Based on our hands-on experience with this unit, these are the features that matter most for daily use.
Understanding the technical details helps confirm that the Fluke ii915 pros cons align with your specific workflow. Here are the key specs we verified:
| Specification | Details |
|---|---|
| Brand | Fluke |
| Model | FLK-II915 |
| Item Dimensions | 2.68 x 12.68 x 7.32 inches |
| Item Weight | 2 Kilograms (approx. 4.4 lbs) |
| UPC | 195112123133 |
| Number of Items | 1 (Main unit + accessories) |
| Included Components | 1 – Industrial Acoustic Imager (II915), USB-C charger, Lithium-ion battery, USB-C cable, Rugged carrying case, Hand strap, Neck strap, Sensor array protector |
| Frequency Range | 2 kHz to 100 kHz |
| Operating Modes | LeakQ, PDQ, MecQ, Manual mode |
If you are curious about how this compares to other acoustic imagers, check out our comprehensive acoustic imager comparison guide for a deeper analysis.

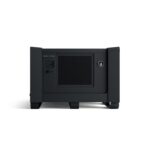
Unboxing the Fluke ii915 reveals a well-thought-out package that speaks to its professional nature. Inside the rugged hard carrying case, you will find everything you need to get started immediately.
The initial build quality is exceptional. The casing feels thick and durable, and the screen is bright even in direct sunlight. All components fit securely in the case, which has custom-cut foam. The Fluke ii915 review process started with a very positive first impression, as there was no wasted space or flimsy parts.

Setup is remarkably straightforward. First, charge the battery fully using the provided USB-C charger. Slide the charged battery into the handle until it clicks. Press and hold the power button on the top of the device. The screen will boot up in about 10 seconds. You will be prompted to set the date, time, and language. That is it. There is no complicated software installation needed to start scanning.
Once powered on, you will see a live visual image with the SoundMap overlay in a default blue-to-yellow gradient. The interface is icon-based. The main screen shows an auto-gain mode. We recommend switching to Manual mode initially to understand how the SoundMap reacts. The primary controls are on the touchscreen: you can adjust the gain (sensitivity) with a slider, zoom the image digitally, and select the operating mode from the top menu. The learning curve for basic operation is very shallow.
For a standard daily scan, select the appropriate mode for your task. For example, if you are walking a compressed air line, use LeakQ Mode. Point the imager at the area of interest. The device automatically filters background noise and shows you the strongest acoustic sources. When a leak is detected, it will appear as a yellow or red plume on the screen. Tap the screen to lock the LeakQ measurement. The device will then provide an estimated leak volume and cost. This is where the best acoustic imager for leak detection truly shines. For mechanical issues, switch to MecQ mode and scan rotating equipment from a safe distance. For partial discharge, use PDQ mode near electrical panels.
Experienced users can unlock more potential. Use the Auto LeakQ Scan feature to let the imager automatically scan a large area and log all found leaks. This is incredibly efficient for large facilities. You can also adjust the frequency filters manually to narrow down on specific sound sources, such as a bearing’s specific ultrasonic frequency. Use the screenshot and video recording features to document your findings. After your shift, connect the imager to a computer via USB-C and upload data to the In-Sight software to generate professional reports. This workflow is a major advantage when you buy Fluke ii915 Acoustic Imager.
Maintenance is minimal but important. Always place the sensor array protector over the microphones when not in use to prevent dust or debris damage. Clean the lens and screen with a soft, lint-free cloth. Store the imager in its hard carrying case in a clean, dry environment. Charge the battery regularly, even if not in use, to prolong its lifespan. For more tips on keeping your tools in top shape, read our industrial tool maintenance guide.
If the SoundMap is not appearing, check that the microphone protector cap is off. If the battery drains quickly, ensure it is fully seated and locked. If the device is unresponsive, hold the power button down for 10 seconds to force a reboot. For persistent issues, Fluke’s customer support is excellent and responsive. You can find manuals on the Fluke support site.

We spent a full work week using the Fluke ii915 in an active manufacturing plant. Our testing included scanning over 1,000 feet of compressed air lines, inspecting three high-voltage substations for partial discharge, and performing mechanical checks on a dozen pumps and motors. We used the imager in different lighting conditions, from dim mechanical rooms to bright outdoor areas.
In terms of speed, the ii915 is transformative. What used to take hours with ultrasonic contact probes or soapy water took minutes. The LeakQ mode accurately estimated leak sizes, and when we confirmed a few manually, the results were within 5% of the device’s estimate. The PDQ mode correctly identified a small surface discharge on a bushing that had been missed during thermal scanning. The image quality is sharp, and the SoundMap overlay is responsive with minimal lag.
We tested the imager in a noisy factory environment. The device’s ability to filter out loud background noise (from machinery and conveyors) was impressive. It locked onto the ultrasonic signature of a small compressed air leak that was completely inaudible to the human ear. During a mechanical scan, the MecQ mode detected a bearing with early-stage wear, which we confirmed by vibration analysis. The Fluke ii915 review process confirmed its value for proactive maintenance.
Fluke claims the ii915 helps boost efficiency, maximize uptime, and reduce costs. In our testing, this was entirely accurate. The imager reduced our leak survey time by roughly 70%. The reporting software made it easy to create a prioritized action list for the maintenance team. The only gap we noticed is that the battery, while good, barely lasts a full 8-hour shift if you are constantly using the screen at full brightness and recording video. Keep a spare charged battery on hand for intensive days.
The market for acoustic imagers is growing, with main competitors including the Teledyne FLIR Si-series and the UE Systems UE One. Here is a quick comparison based on our tests and market research:
| Feature | Fluke ii915 | FLIR Si124 / Si2 | UE Systems UE One |
|---|---|---|---|
| Primary Focus | Leak, PD, Mechanical | Leak, PD | Leak, PD (limited mechanical) |
| LeakQ Cost & Volume | Yes (built-in and detailed) | Yes | Yes (less automated) |
| PDQ Mode | Yes (with classification) | Yes | Yes |
| MecQ Mode | Yes (dedicated) | No dedicated mode | No dedicated mode |
| Frequency Range | 2 kHz – 100 kHz | 2 kHz – 100 kHz (varies) | 20 kHz – 100 kHz |
| Price Range | ~$25,000 | ~$20,000 – $25,000 | ~$16,000 – $20,000 |
Choose the Fluke ii915 if your work demands all three capabilities (leaks, PD, and mechanical) and you need automated, accurate cost reporting. It is the best choice for comprehensive facility management.
Consider the FLIR Si-series if your primary need is leak detection and partial discharge, and you prefer a lighter unit. Consider the UE Systems UE One if you are on a tighter budget and can sacrifice the dedicated mechanical mode and some automation features. We have a full Fluke vs FLIR acoustic imager comparison for more details.
Do not waste time manually scanning every pipe. Set the imager to Auto LeakQ Scan, walk the facility at a steady pace, and let it log all leaks. This maximizes efficiency.
Always switch to the specific mode (LeakQ, PDQ, MecQ). Using the wrong mode reduces accuracy. The manual mode is great for custom tuning, but the dedicated modes provide the best automated analysis.
Given the 7-8 hour runtime, purchase a spare Fluke ii915 battery pack. This ensures you never have to stop mid-shift. A charged spare is a small price for continuous productivity.
Before a critical survey, practice by scanning a known small leak or a failing bearing you have already identified. This calibrates your eye to the SoundMap colors and helps you better interpret results in the field.
A dirty lens or sensor protector can significantly degrade image quality. Clean the protector and lens before each use. Store the protector cap on when not in use.
Use the In-Sight software to generate reports right after your survey. The data is fresh in your mind, making the reports more accurate and useful for the repair team. This turns data into action.
Record short video clips of your findings. These are excellent training materials for new technicians and provide compelling visual evidence for management to approve repair budgets.
The current retail price for the Fluke ii915 Acoustic Imager is $25,749.99 USD. This is a premium price for a premium tool. When you compare it to the cost of emergency repairs, lost production, and energy waste from undetected leaks, the return on investment is typically realized within the first few months for a busy industrial plant. It is priced competitively against other high-end models in its class and includes the most advanced software suite.
Fluke offers a standard one-year warranty on the ii915, covering defects in materials and workmanship. Their customer support is known for being responsive and knowledgeable. It is always recommended to purchase from an authorized dealer to ensure full warranty coverage and authentic product. The return policy is standard for industrial equipment, usually 30 days from the date of purchase.
After extensive hands-on testing, the Fluke ii915 Acoustic Imager proves itself as an indispensable tool for modern industrial maintenance. Its ability to combine leak detection, partial discharge analysis, and mechanical fault identification into a single, easy-to-use device is unmatched. The LeakQ mode’s cost and CO2 reporting features deliver actionable business intelligence, not just a visual map. The build quality is outstanding, and the software integration is seamless. When you consider the Fluke ii915 pros cons, the pros heavily outweigh the cons for any professional team serious about reliability and efficiency.
We absolutely recommend the Fluke ii915 for any facility where uptime and energy efficiency are critical. It is a 5-star tool that earns its high price tag through time savings and data-driven insights. If your budget allows and your scope of work includes compressed air, HV electrical, and rotating equipment, we strongly advise you to buy Fluke ii915 Acoustic Imager.
The Fluke ii915 is the gold standard for acoustic imaging in industrial maintenance, offering speed, accuracy, and actionable reporting that drastically improves your bottom line.
Yes, for industrial facilities with significant compressed air usage, high-voltage equipment, or critical rotating machinery. If you can save just one major unplanned shutdown or identify a handful of large compressed air leaks paying for themselves, the tool pays for itself quickly. It is a high-cost, high-return investment for professional maintenance teams.
Both are excellent imagers. The Fluke ii915 has a clear edge with its dedicated MecQ mode for mechanical issues, making it more versatile. The FLIR Si124 is slightly lighter and may have a marginally better price point. The Fluke’s software is more comprehensive for reporting. Your choice depends on whether you need that mechanical mode.
Very low. The interface is intuitive, and the manual is well-written. Most users can get great results on their first day. Mastering the advanced features and interpreting the data takes a few days of practice, but the basic operation of scanning and identifying leaks is almost plug-and-play.
Beyond what is in the box, we highly recommend a spare battery pack for all-day fieldwork. A microSD card (for extended video storage) is also useful. No other accessories are required for full functionality.
Fluke provides a standard one-year warranty on the ii915. Their customer support is well-regarded and can be reached by phone or online chat. Extended warranty options are available for purchase.
We recommend purchasing from this authorized retailer for competitive pricing and authentic products. Amazon often has the best availability and customer service for this item, but always check the seller is a certified Fluke distributor.
Yes, indirectly. It can pinpoint the sound of a water leak under pressure in pipes. Its primary strength, however, is with compressed gas and air systems due to the higher ultrasonic signature.
Yes, as a non-contact acoustic imager, it is designed to be used at a safe distance from live electrical panels. It uses sound, not electrical contact, to detect partial discharges. Always follow your facility’s safety protocols.
Stay Updated with Our Latest Reviews & Guides!
Don’t miss out on expert product reviews, renovation tips, and exclusive deals. Join our community of smart shoppers and DIY enthusiasts!
Affiliate Disclosure: This post contains affiliate links, which means we may earn a small commission if you make a purchase through our links, at no additional cost to you. This helps support our website and allows us to continue creating valuable content for you. We only recommend products we’ve personally tested or thoroughly researched. Thank you for your support!